Dieses Wiki ist ein Archiv bis 2023. Das aktuelle Wiki findet sich unter https://wiki.hamburg.ccc.de/
Difference between revisions of "Prusa i3 MK3S"
(first attempt) |
|||
| Line 1: | Line 1: | ||
[[File:Prusa_i3_MK3.jpg|200px]] | [[File:Prusa_i3_MK3.jpg|200px]] | ||
| − | |||
| + | == General Information == | ||
| + | |||
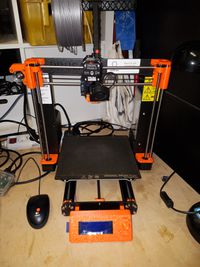
| + | about our Prusa 3D printer. There is a Raspberry Pi connected to it, which is running the Octoprint Server. You can reach it by opening a browser and typing in the IP address 10.42.23.234 (HTTP:\\10.42.23.234). From here, you can click on the '''Control''' tab and watch the 3D printer printing via the webcam attached to it. | ||
| − | + | (NOTE: This will only work if you are logged into the club's WiFi. It will not work from home. It will not work if you are logged into FreiFunk's wifi connection.) | |
| − | |||
| − | Instructions for users of ''Microsoft Windows'' | + | == Instructions for users of ''Microsoft Windows'' == |
| + | This is how I got it working on a 64-bit laptop running ''Windows 10''. | ||
1. Download the latest version of the Slic3r (Prusa Edition) Software from GitHub: https://github.com/prusa3d/Slic3r/releases. (In case the link is dead, it's really important you look for the Prusa Edition, which is a fork of the original Slic3r software. Downloading and installing the non-Prusa edition of Slic3r means you won't get the hardware configuration file necessary to run the printer. As of today, GitHub hosts software for OSX, Linux, Windows (32-bit) and Windows (64-bit). | 1. Download the latest version of the Slic3r (Prusa Edition) Software from GitHub: https://github.com/prusa3d/Slic3r/releases. (In case the link is dead, it's really important you look for the Prusa Edition, which is a fork of the original Slic3r software. Downloading and installing the non-Prusa edition of Slic3r means you won't get the hardware configuration file necessary to run the printer. As of today, GitHub hosts software for OSX, Linux, Windows (32-bit) and Windows (64-bit). | ||
Revision as of 20:46, 11 November 2018
General Information
about our Prusa 3D printer. There is a Raspberry Pi connected to it, which is running the Octoprint Server. You can reach it by opening a browser and typing in the IP address 10.42.23.234 (HTTP:\\10.42.23.234). From here, you can click on the Control tab and watch the 3D printer printing via the webcam attached to it.
(NOTE: This will only work if you are logged into the club's WiFi. It will not work from home. It will not work if you are logged into FreiFunk's wifi connection.)
Instructions for users of Microsoft Windows
This is how I got it working on a 64-bit laptop running Windows 10.
1. Download the latest version of the Slic3r (Prusa Edition) Software from GitHub: https://github.com/prusa3d/Slic3r/releases. (In case the link is dead, it's really important you look for the Prusa Edition, which is a fork of the original Slic3r software. Downloading and installing the non-Prusa edition of Slic3r means you won't get the hardware configuration file necessary to run the printer. As of today, GitHub hosts software for OSX, Linux, Windows (32-bit) and Windows (64-bit).
(NOTE: To find out if you have a 32-bit or 64-bit Windows OS, type "Prozessorinformationen anzeigen" in the search box. You'll find the information you are looking for under the label Systemtyp.)
2. When installing the Slic3r Prusa Edition (PE) software, select "Original Prusa i3 MK3 with 0.4mm nozzle". Click next. Accept the two default things already check-marked and click Finish.
3. On the webpage where you are connected to the Octoprint Server, click on the wrench icon in the top right-hand corner. This will bring you to the settings page (HTTP:\\10.42.23.234/#settings_dialog). The OctoPrint Settings dialog window opens. From the left-hand side menu, under the heading FEATURES, click the API link (HTTP:\\10.42.23.234/#settings_api). Copy the API Key (6F9E5089D2BD4925A592E7A63E5874E4)
